Combo is locking you down for too long
 Debuff Reducer
What to do: Buy Debuff Reducer if Combo duration is the main problem.
Why it helps: It is a cheap way to shorten the long control window without committing immediately to a high-tier active.
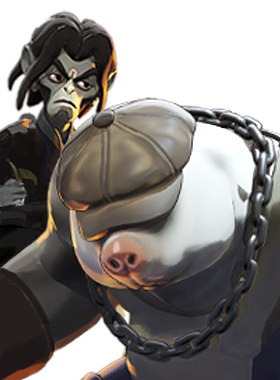
Learn which items answer Mo & Krill’s threats, how to play the lane, and when to commit or disengage.
Debuff Reducer Indomitable
 Unstoppable
 Counterspell
 Toxic Bullets
 Decay
Decay Spirit Burn
 Rescue Beam
 Bullet Resist Shredder
Buy for the threat you are facing. These are situational options, not a build to purchase in full. Tap an item for its breakdown.
Keep enough distance to deny a comfortable Combo, and do not assume a wall makes the entire exchange safe. Choose between reducing repeated control and protecting against the grab before committing into range. Against the health-and-sustain problem, apply the relevant damage and anti-heal answer early in the fight.
Debuff Reducer cheaply shortens Combo, while Indomitable or Unstoppable answers the grab more directly; Counterspell is possible but timing-sensitive. Toxic Bullets or Decay are especially efficient because percentage-health damage and healing reduction both scale well into their large health pool.
Identify what is losing the exchange, then use the answer and timing below.
Debuff ReducerWhat to do: Buy Debuff Reducer if Combo duration is the main problem.
Why it helps: It is a cheap way to shorten the long control window without committing immediately to a high-tier active.
IndomitableWhat to do: Use Indomitable or Unstoppable; Counterspell is possible but harder to time.
Why it helps: The grab is the fight-ending event, so a dedicated hard-control answer is worth the slot.
Toxic BulletsWhat to do: Use Toxic Bullets or Decay.
Why it helps: Percentage-health damage and healing reduction both scale well into Mo & Krill's large health pool.
Rescue BeamWhat to do: Use Rescue Beam on the grabbed ally when positioning allows.
Why it helps: Team-save utility can deny the isolation kill even when the victim did not have Indomitable or Unstoppable available.
Bullet Resist ShredderWhat to do: Apply bullet-resistance reduction with coordinated weapon follow-up.
Why it helps: The item guide source identifies Mo & Krill as a useful resistance-shred matchup; weapon damage needs access to the target to convert that reduction.
A retreating target can still punish a close pursuit. Keep the grab threat in mind when deciding whether a chase is worth finishing.
A wall alone does not block everything. Combine cover with distance and a prepared control answer.
Reduces enemy healing and sustain during fights.
Useful answers: Toxic Bullets · Decay · Spirit Burn
Limits control-led combos through immunity, a qualifying automatic response, shorter debuffs, or a barrier after the catch.
Useful answers: Indomitable · Unstoppable · Debuff Reducer
Interrupts vulnerable channels or denies an important cast before it starts. Silence alone is not a universal channel interrupt.
Debuff ReducerShortens status effects without needing an active button.
Use in this matchup:
IndomitableAutomatically breaks the next qualifying control effect and grants a barrier.
Use in this matchup:
UnstoppableProactive crowd-control immunity for an important commitment.
CounterspellUpgrades parry to block ability damage and effects.
Toxic BulletsRepeated weapon hits apply anti-heal and maximum-health bleed.
Use in this matchup:
DecayTargeted healing reduction with current-health damage over time.
Spirit BurnSpirit-damage buildup triggers an explosion, burn, and healing reduction.
Rescue BeamHeals a teammate and pulls them out of danger.
Use in this matchup:
Bullet Resist ShredderReduces enemy bullet resistance for stronger weapon follow-up.
Use in this matchup: