Deadlock Counter Item Library
Find the best Deadlock counter items for the threat in front of you—from anti-heal against sustain to bullet defense, spirit protection, cleanses, and tools that stop an escape.
Compare what each counter item solves, which hero matchups it fits, and when to buy it. Use the early-, mid-, and late-game tags as a starting point, then choose for the enemy build and the next fight your team needs to win.
Game-stage ranges are approximate: early game is 0–10 minutes, mid game is 10–20 minutes, and late game is 20+ minutes. Buy sooner when an item solves the threat costing you fights.
 Alchemical Fire
Alchemical Fire helps dismantle the space an enemy team wants to fight from. Its area damage is especially useful against clustered summons: clear the setup first, then take the fight on ground that favors you.
 Armor Piercer
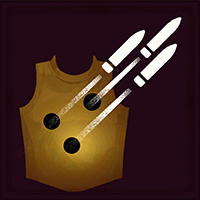
Armor Piercer gives weapon carries a way to pressure enemies protected by bullet resistance or barriers. Its bullet procs bypass those defenses, making sustained shooting more useful against a target that ordinary weapon damage struggles to finish.
 Bullet Resist Shredder
Bullet Resist Shredder makes a focused target more vulnerable to weapon damage. It shines when your own gun pressure and your teammates' bullets land together, turning a resistance reduction into a practical opening to finish the fight.
 Capacitor
Capacitor combines weapon-build value with a targeted catch. Its projectile slows an enemy, prevents stamina usage, and restricts movement abilities and items, giving your team a window to punish a target that normally escapes.
 Counterspell
Counterspell rewards reading an enemy's commitment. By upgrading your parry to block ability damage and effects during its protection window, it lets you turn a predictable burst or control attempt into a missed opportunity for the opponent.
 Cultist Sacrifice
Cultist Sacrifice turns enemy setup into an opportunity. Building on Monster Rounds, it improves NPC pressure and can consume eligible summons for souls and a lasting buff, making it particularly useful when McGinnis keeps building turret positions.
 Cursed Relic
Cursed Relic creates a powerful team focus-fire window by interrupting, silencing, disarming, locking items, and removing non-ultimate buffs. Its outgoing-damage penalty makes allied follow-up central to the purchase: choose the target together and be ready to punish.
 Debuff Reducer
Debuff Reducer helps you spend less of each fight under status effects. It is a passive answer to repeated disruption, useful when shorter debuffs give you room to move or trade without relying on another active button.
 Decay
Decay
Decay gives you a direct way to put healing reduction on a sustain target, alongside current-health damage over time. It suits fights where you need anti-heal applied deliberately before the enemy starts winning the health trade.
 Disarming Hex
Disarming Hex stops a target from firing their weapon, creating breathing room against gun-focused carries. It is particularly useful when your team wants to keep fighting through the enemy's damage window rather than only protect one player.
 Dispel Magic
Dispel Magic resets a fight weighed down by removable non-ultimate debuffs. Use it to clear effects such as Bebop's Sticky Bomb before detonation, then reposition or recommit with the debuff gone. Its activation restrictions are part of the decision.
 Divine Barrier
Divine Barrier turns a defensive purchase into a teammate save. Its shield and debuff purge can protect an ally during a dangerous sequence, including removable bomb pressure, when you keep a clear view and a usable save angle.
 Enduring Speed
Enduring Speed helps you reclaim distance against slows and persistent chases. The speed and slow resistance matter most when they let you leave an enemy's preferred range, break an exposed angle, or arrive at cover before another trade.
 Escalating Resilience
Escalating Resilience rewards weapon users who can keep shooting through a longer exchange. Its bullet resistance builds as you attack, helping you hold your ground against sustained gun pressure while continuing to contribute damage.
 Ethereal Shift
Ethereal Shift lets you sit out a dangerous moment through brief invulnerability and untargetability. Against a committed burst or a short ultimate window, the goal is to waste the enemy's investment and return with a plan for your next position.
 Extra Regen
Extra Regen is a lane-stabilizing purchase for health lost between trades. The value comes from staying available to last-hit and contest souls: recover behind cover, adjust your angle, and avoid giving back the same health to free poke.
 Extra Stamina
Extra Stamina gives you more movement decisions in a fight. An additional dash or air movement option can be the difference between dodging a readable threat and having nothing left after spending stamina to farm or trade.
 Fleetfoot
Fleetfoot helps you manage fighting distance with an active speed boost. It suits heroes who want to keep pressure on a target while kiting away from close-range threats, or quickly change position before the next damaging exchange.
 Healbane
Healbane turns your spirit damage into healing reduction, making it a natural counter-buy for ability users facing sustain. Apply it before the enemy gets full value from healing, then use the reduced recovery to help your team secure the kill.
 Healing Rite
Healing Rite helps you recover between fights and return to lane with enough health to contest farm. It works best when you can step out of the enemy's pressure, complete the recovery safely, and avoid returning to the same exposed angle.
 Indomitable
Indomitable provides an automatic response to the next qualifying control effect, then adds a barrier and cooldown relief. It is valuable against catches that leave little time to press a defensive active, provided its protection is ready for the important event.
 Juggernaut
Juggernaut slows enemy fire rate when you take hits, helping frontline players manage sustained weapon pressure. It is most useful when you can survive the exchange and keep holding space, rather than absorbing damage from an unwinnable position.
 Knockdown
Knockdown gives your team a delayed stun to punish airborne targets and interrupt vulnerable channels. The delay is the key detail: cast while there is still time for the stun to land, and have damage ready when the target is controlled.
 Metal Skin
Metal Skin gives you a temporary bullet-immunity window against decisive weapon pressure. Against a gun carry, activate it for the dangerous commitment and use that time to reach cover or let allies respond; it does not remove debuffs already on you.
 Monster Rounds
Monster Rounds helps you clear minions and summons before they take control of your lane or a fight. Against enemy setup, removing the extra targets first can be more effective than trying to damage the hero while every summon is still active.
 Mystic Slow
Mystic Slow adds movement pressure to ability damage, helping spirit builds keep enemies within reach or create distance from a pursuer. It works through the damage you can actually land, so reliable ability contact matters more than simply owning the item.
 Phantom Strike
Phantom Strike lets you commit directly to an enemy, ground them, and create a slowed, disarmed window. It can help punish an aerial carry, but the arrival point matters: your hero must survive where the target is standing.
 Plated Armor
Plated Armor offers passive chances to deflect bullets and prevent weapon on-hit effects. Against repeated gun hits and stacking pressure, it can slow the buildup that makes the exchange dangerous, while leaving you free to manage positioning and other actives.
 Reactive Barrier
Reactive Barrier adds an automatic shield after a hard-control catch. It helps absorb the follow-up damage that often turns a stun into a kill, giving you a chance to reach cover or receive help once you can act again.
 Rebuttal
Rebuttal strengthens your response to melee pressure through a successful parry. Healing, returned damage, and a shorter parry cooldown help disrupt repeated melee trades, making it a useful lane counter when you can recognize the actual melee attack.
 Rescue Beam
Rescue Beam combines healing with a positional teammate save. The pull can remove an ally from the enemy's ongoing damage angle, so a good rescue depends as much on where you bring them as on how much health they recover.
 Restorative Locket
Restorative Locket turns accumulated stacks into a self-heal, helping you stay present through repeated exchanges. The reset is most useful when it gives you enough health to keep farming or rejoin a fight from a better angle.
 Return Fire
Return Fire punishes enemies for damaging you during an exchange you can survive. It suits durable brawlers facing sustained pressure: combine the reflection with appropriate defense so the opponent pays for continuing to shoot instead of simply winning the damage race.
 Ricochet
Ricochet spreads weapon pressure to nearby targets, helping gun builds handle clustered enemies and summons. Its counter value grows when an enemy setup gives you several useful targets to hit from one safe angle, rather than a single isolated opponent.
 Rusted Barrel
Rusted Barrel reduces an enemy's fire rate, making sustained gun trades easier to manage. Apply it during the exchange you want to change, then use the reduced weapon pressure to contest the wave, reposition, or return damage.
 Scourge
Scourge pairs defensive resistance with a close-range aura that damages enemies based on maximum health. It suits heroes who can stay near a large-health target without losing the fight simply to maintain aura uptime.
 Silence Wave
Silence Wave creates a cast-denial window before an enemy uses an important ability. Land the projectile as your team is ready to commit, then punish while escape or defensive casts are restricted. A silence is not a universal answer to an already-running channel.
 Silencer
Silencer turns sustained weapon hits into pressure against ability-reliant enemies, reducing outgoing spirit damage and building toward silence. It fits gun users who can stay on a target long enough to restrict the cast that would otherwise turn the fight.
 Siphon Bullets
Siphon Bullets creates a temporary health swing through repeated weapon hits, stealing a percentage of the enemy's maximum health. Against a large-health target, sustained contact and a coordinated finish help convert that temporary advantage before the stolen health returns.
 Slowing Hex
Slowing Hex is a targeted answer to movement-dependent escapes. Use the slow and movement-skill silence before the relevant escape begins, with allies already in range to punish; a catch has little value if no one can finish the target.
 Spellbreaker
Spellbreaker helps against spirit-heavy burst through spirit and debuff resistance plus periodic mitigation of a large spirit hit. Its protection is most valuable when available for the ability that matters, rather than spent on an earlier qualifying hit.
 Spirit Burn
Spirit Burn rewards builds that can reach its spirit-damage trigger, adding an explosion, damage over time, and healing reduction. It combines damage scaling with anti-sustain pressure, but you must trigger the effect before the enemy's recovery decides the fight.
 Spirit Resilience
Spirit Resilience provides consistent passive protection against spirit damage. It helps when abilities keep wearing you down across multiple exchanges, giving you a baseline defense while you focus on positioning, cooldowns, and your own contribution to the fight.
 Spirit Sap
Spirit Sap reduces a target’s Spirit Power and Spirit Resist. Use it before a spell trade to weaken their Spirit-scaling damage and help your team’s spirit damage land harder.
 Spirit Shielding
Spirit Shielding creates a barrier after a burst of spirit damage, helping absorb what follows. It is useful when the opening ability hit starts a dangerous trade and a shield gives you time to reach cover or return manageable damage.
 Stamina Mastery
Stamina Mastery supports matchups that demand repeated movement, including successive dodges and vertical escapes. The extra flexibility helps only if you keep a reserve for the next threat instead of spending every movement option on the first exchange.
 Suppressor
Suppressor lets spirit-damage users reduce an enemy's fire rate through their damage pressure. It is useful when your spirit damage can reach a gun carry consistently, helping your team trade with less sustained weapon pressure.
 Tank Buster
Tank Buster helps damage remain useful against large health pools through percentage current-health damage that bypasses spirit resistance. It addresses durability, while healing and defensive casts may still require separate answers from you or your team.
 Toxic Bullets
Toxic Bullets gives weapon users anti-heal and percentage-health bleed after repeated shooting. It fits carries who can keep landing shots on a sustain target, with the application built before the enemy's important healing window.
 Unstoppable
Unstoppable protects a planned commitment from crowd control. Activate it before the dangerous control sequence begins, especially when repeated disables would stop you from completing an engage or dealing damage. You still need a position that survives the incoming damage.
 Veil Walker
Veil Walker uses veil routes to give you speed and stealth for a safer approach or rotation. Its counter value comes from changing the angle an enemy can pressure, rather than expecting movement benefits while staying exposed in a direct duel.
 Warp Stone
Warp Stone gives you an immediate position change and bullet resistance, helping escape a close threat or committed damage angle. Pick a destination that removes follow-up pressure; teleporting within the same danger wastes much of the opportunity.
 Weapon Shielding
Weapon Shielding creates a barrier after a burst of weapon damage, helping absorb follow-up pressure. Use that shield window to reach cover or return a manageable trade instead of staying exposed until the next burst overwhelms you.
No items match this search. Try another item, hero, or counter role.
Recommendations are situational. Match your purchase to the threat, your damage pattern, and the timing you can use reliably.